
Reloading Journal Entry No.1
Around 2019 or 2020, I picked up a Lee Enfield No.4 mk1 at a local gun show for under $300. “That’s a steal” you might think, but there were some caveats. The first and most important in terms of functionality was that the extractor spring was completely missing (unbeknownst to me at the time of purchase), the second blemish on this rifle, which doesn’t really effect functionality was that a previous owner so graciously sporterized it by removing the front sight guard, the top half of the front handguard, and chopped down the bottom section, nice. The extractor spring was eventually fixed by bending up a piece of spring steel from an old windshield wiper, and it worked good enough that I never actually swapped in the correct part I ordered. Now onto the subject of this article, at the time when I bought this rifle, .303 British was easy enough to come by that I was able to find it at the store, but as the years have gone by, none of my local gun stores really stock .303 anymore, as well as the going price per round I’ve found to be around $2/round. To top this all off, I live in a state that has unfortunately banned my ability to ship ammunition directly to my house. So if I were to buy a few boxes of .303, I would have to order it from a website, pay to ship it to an FFL, and then pay a $2.50 background check fee. I’m not going to be buying .303 in bulk, but I want to be able to shoot this rifle, and because of my dwindling supply of .303, I haven’t shot it in years. The solution? Reload at home.
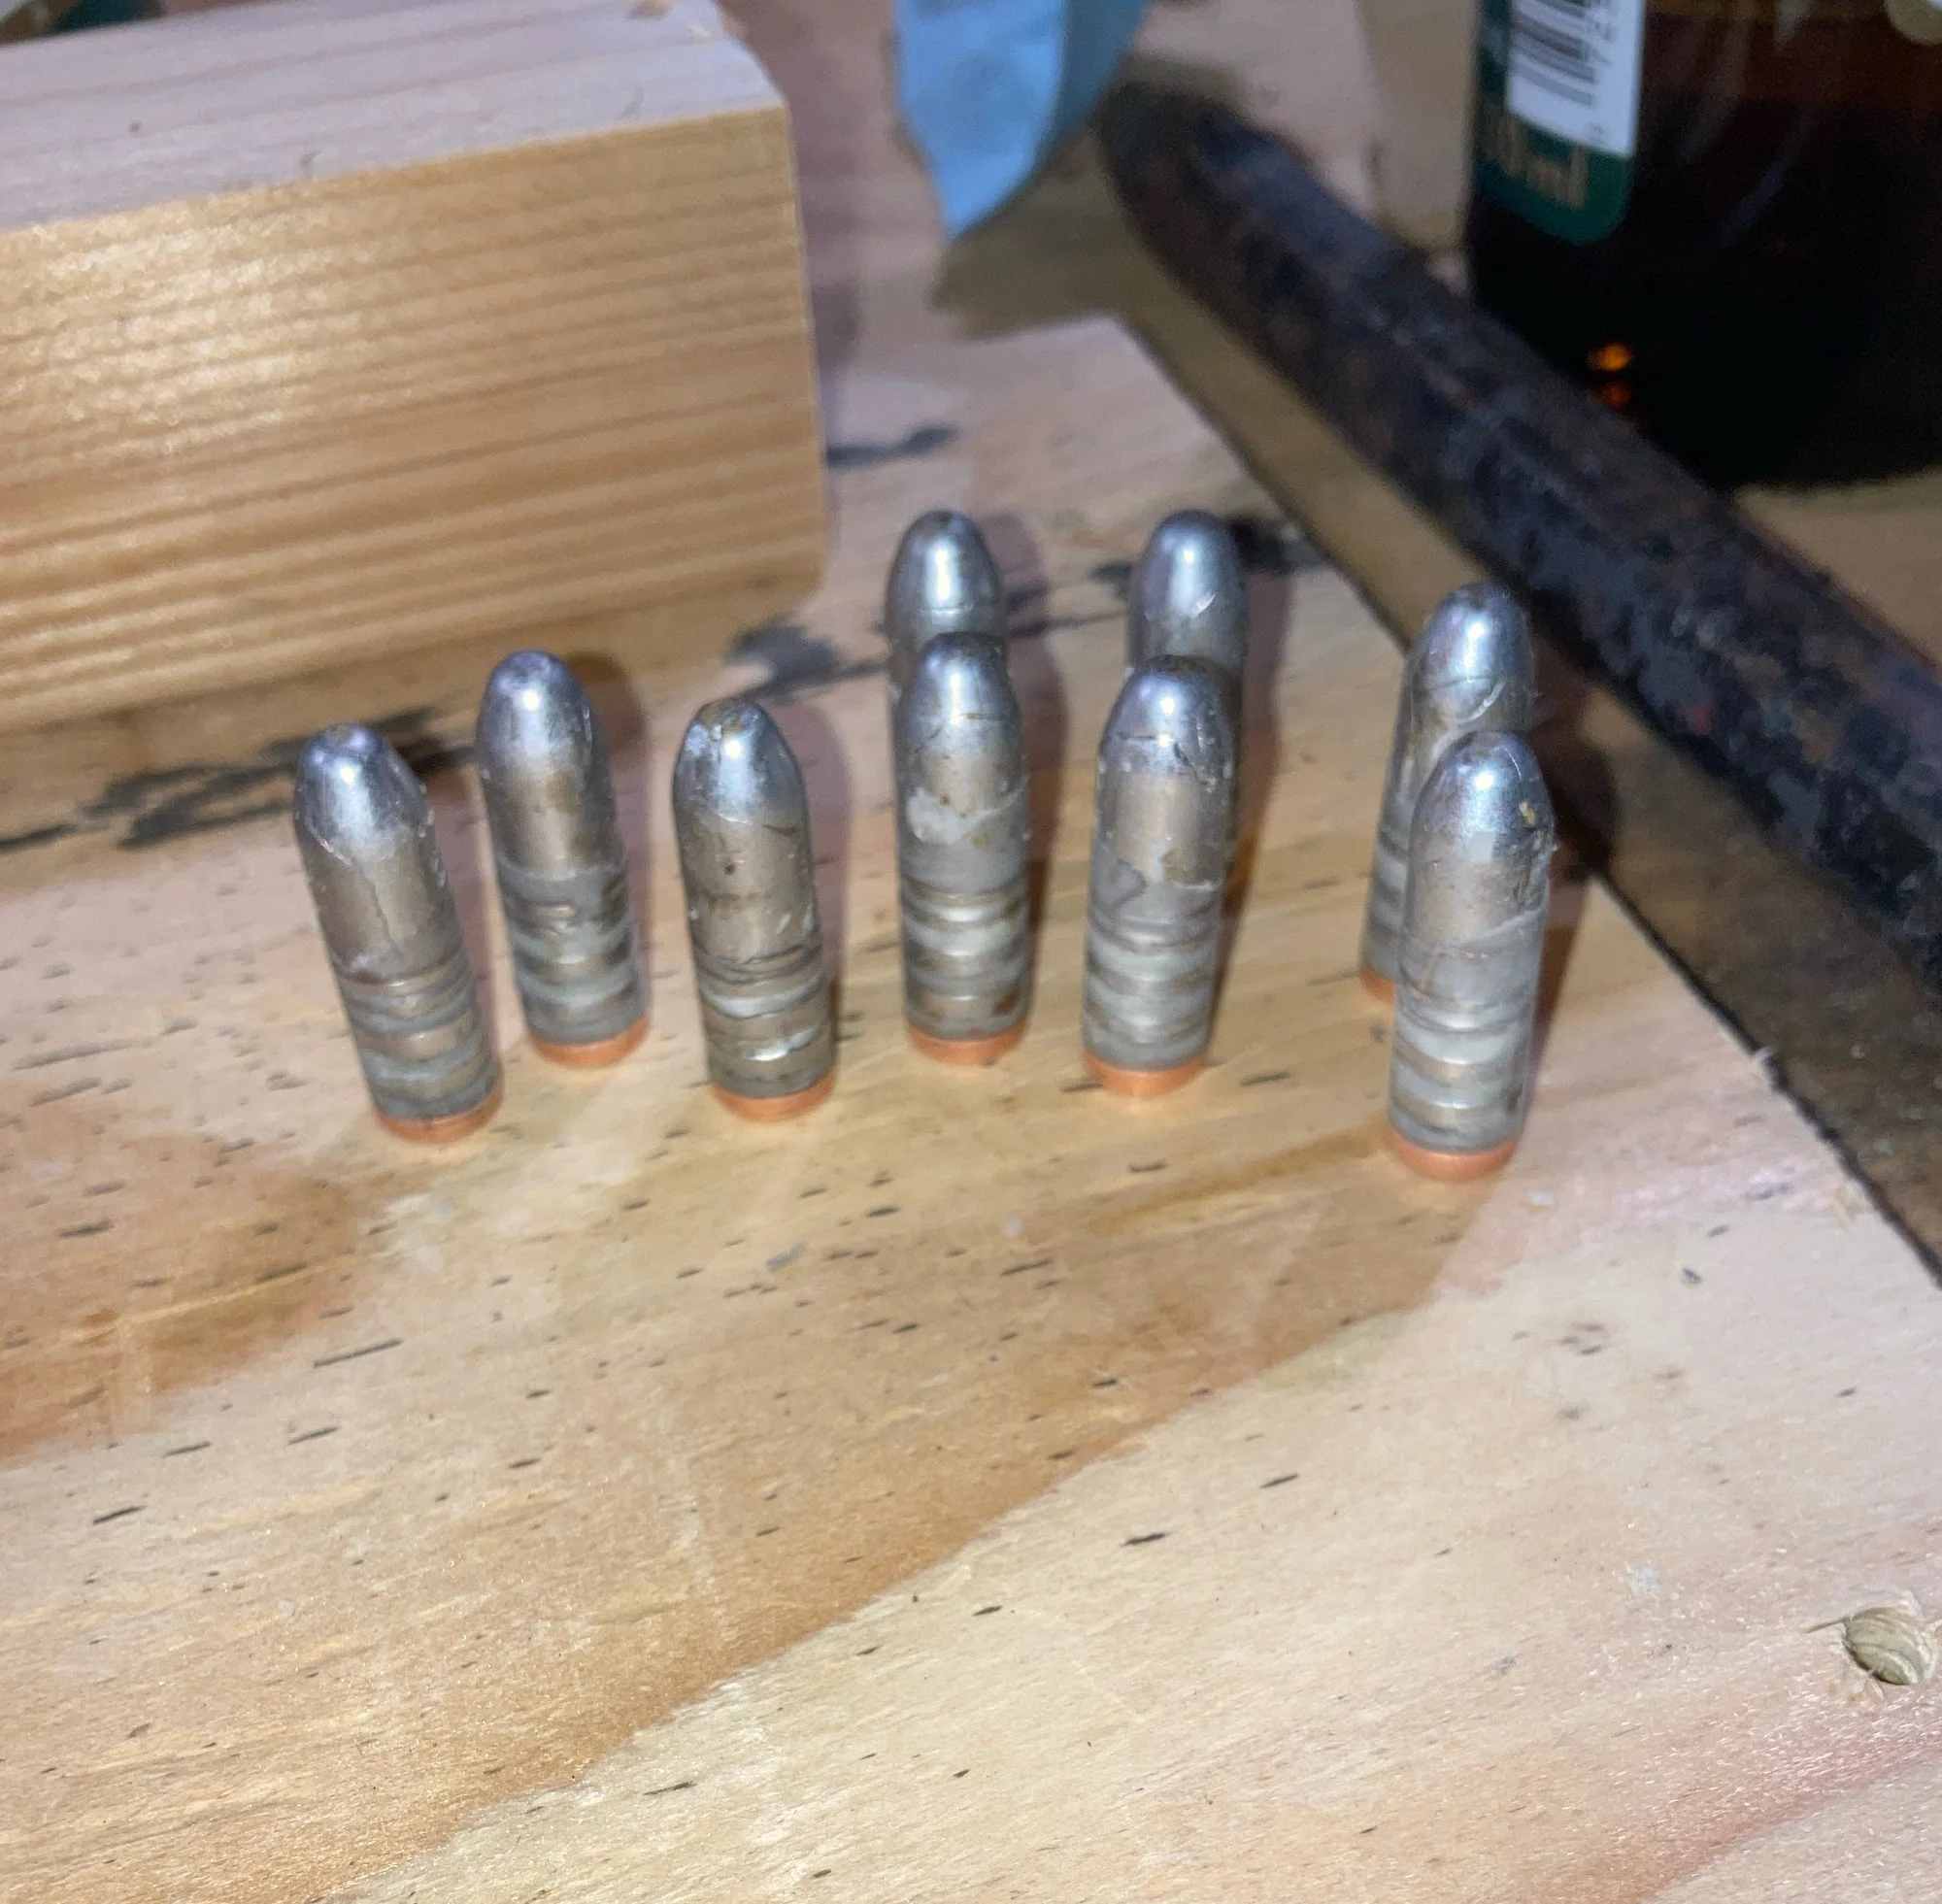
Gas checked hardcast lead .303 bullets, notice the surface rippling as a result of casting mistakes.
So far I have gathered all of the reloading tools and components I need, but haven’t actually reloaded anything, however, I did do some lead casting. This article will be specifically about the process of making the lead projectiles themselves, in a future article I will actually go over reloading the cartridges.
Prior to any casting I needed to order my supplies. I chose to go with the Lee Precision double cavity mold, which produces a 185 grain, .312” diameter bullet. Despite the caliber being called “.303”, the bullet in fact needs to be slightly larger to engage the rifling, additionally the bullets are cast slightly oversized and will need to be run through a sizer later on. The mold was the most expensive component for this portion of the project, going for just under $50, it is reusable of course. Another tool you will need is a sizing die. I chose again the Lee Precision .311” sizing die kit, it’s meant to be used on their reloading press, which I don’t have yet, and will use my hydraulic press instead. I already had the other tools needed for casting from past projects, but for lead you can get away with a steel ladle (don’t use it again for cooking) and a hot wood burning fire, you only need it to be around 700 to 800 degrees Fahrenheit. As far as materials go, scrap lead is already something I had at home from making muzzleloader balls, but with more modern rifle projectiles, you’re going to want to use a lead alloyed with tin and antimony to withstand the higher heat, pressure and resulting velocity achieved with smokeless powder. To augment the durability of my existing lead, I purchased 95% tin/5% antimony solder to be melted in with it. A better source for pre-alloyed lead is old lead tire balance weights, or ideally a reloading supply company.
Once all of my tools and ingredients were assembled I got to casting. Be aware that lead is poisonous, be sure to take precautions when working with it such as being in a well ventilated area, proper hand washing using lead removal wipes or soaps, and even wearing a respirator if need be. Before casting any bullets, I opted to melt all of my lead/tin/antimony in a steel can and pour small ingots for better metallurgic consistency. I first melted down the lead to skim off and impurities and dross, then adding the appropriate amount of tin/antimony solder. My ratio was approximately 5:1 lead to tin/antimony solder by weight, as mentioned before, using tin solder isn’t the best of the best, as the antimony content of the solder itself (which is what facilitates the water hardening) is only 5%, which is much lower once in the final mix. Once I had all of my components weighed out, I got to melting, I used a charcoal, and then coal fire with a blower using my forge. It’s also important to note that you should use flux when melting the lead to help clean it up, using a carbon based flux like beeswax or sawdust helps impurities separate from the lead to be skimmed off. Once the entire batch of lead alloy was melted, I skimmed as much crud off the top as I could, and once it looked clean enough, I poured it into a wood mold with holes drilled in it using a forstner bit. Be sure that when doing any lead casting, your mold is DRY, being extra careful when pouring into wood, as it can absorb water, and potentially cause a steam explosion if you aren’t careful. It’s usually best practice to heat your mold over the fire anyway, which will drive off moisture in the process. Once those cooled and I had my fat lead coins I moved on to the secondary melt. I got a casting ladle as a Christmas gift from my dad that has a straw like pour spout that I used for this project. I decided to do one “coin” at a time, but could have probably done two. It’s important that while your lead is melting, that you start heating up your mold. Since Lee precision (and I assume other brands) are made from aluminum, be careful that your fire isn’t too hot because the melting point of aluminum is around 1,220 degrees Fahrenheit, this probably shouldn’t be a problem with a smaller wood burning fire, but good to keep in mind nonetheless. The reason you want to heat your mold is to inhibit rapid cooling, that will cause deformities in your bullets. Once your lead has melted, be sure to skim any of the sludge (called dross) that forms on the top. Now that your lead is nice and clean (again), get your mold ready and carefully pour the lead into the spout. My first couple of pours I overestimated the quantity and spilled more lead over the top than I wanted to. This isn’t a huge deal but it does make opening the mold a bit more difficult if it drips over the edge, the perfect amount of lead results in a dollop of lead on the pour hole. Give the bullets some time to cool in the mold, but not too cool. You want the formed bullets to still be hot when you pop open the sprue cutter and drop the newly formed bullets into some cool water. This rapid cooling causes the antimony’d lead to harden significantly more than pure lead alone, which results in a more structurally stable bullet. Be sure to dispose of the lead contaminated water properly, i chose to just keep it in the container for next time.
While on this section, I’ll go over mistakes I made the first time around and how I fixed them when I eventually melted down my defective bullets. The first mistake I made was not preheating my mold properly, this caused the bullets to prematurely cool and have ripple lines on the surface, and even cause some bullets to not fully form. Slight surface defects will probably affect accuracy at longer rang, but are probably safe to shoot so long as there’s no weird voids or cavities. I found that by just simply setting my mold next to the fire it preheated nicely enough that the lead stayed fluid on the pour holes and I had to actually wait for it to solidify before knocking the sprue cutter loose. The second issue I ran into was not smoking the mold cavity enough which also resulted in slight surface defects and caused the bullets to stick a bit. I tried to smoke it over my smelting fire, but you want to use a butane lighter for the most consistent soot deposit in the mold. According to Lee Precision, smoking the mold cavity with a lighter is crucial for lubricating the mold and forming an insulating barrier between the molten lead and aluminum mold (aluminum is very heat conductive) additionally, you should lubricate the alignment pins and sprue cutter pivot point, I did not do this but will be doing this going forward. And lastly I had to perfect a pouring technique, which just comes with practice, the ideal pour is a fluid, controlled motion. Having an inconsistent pour will result in voids and other defects in your bullets.
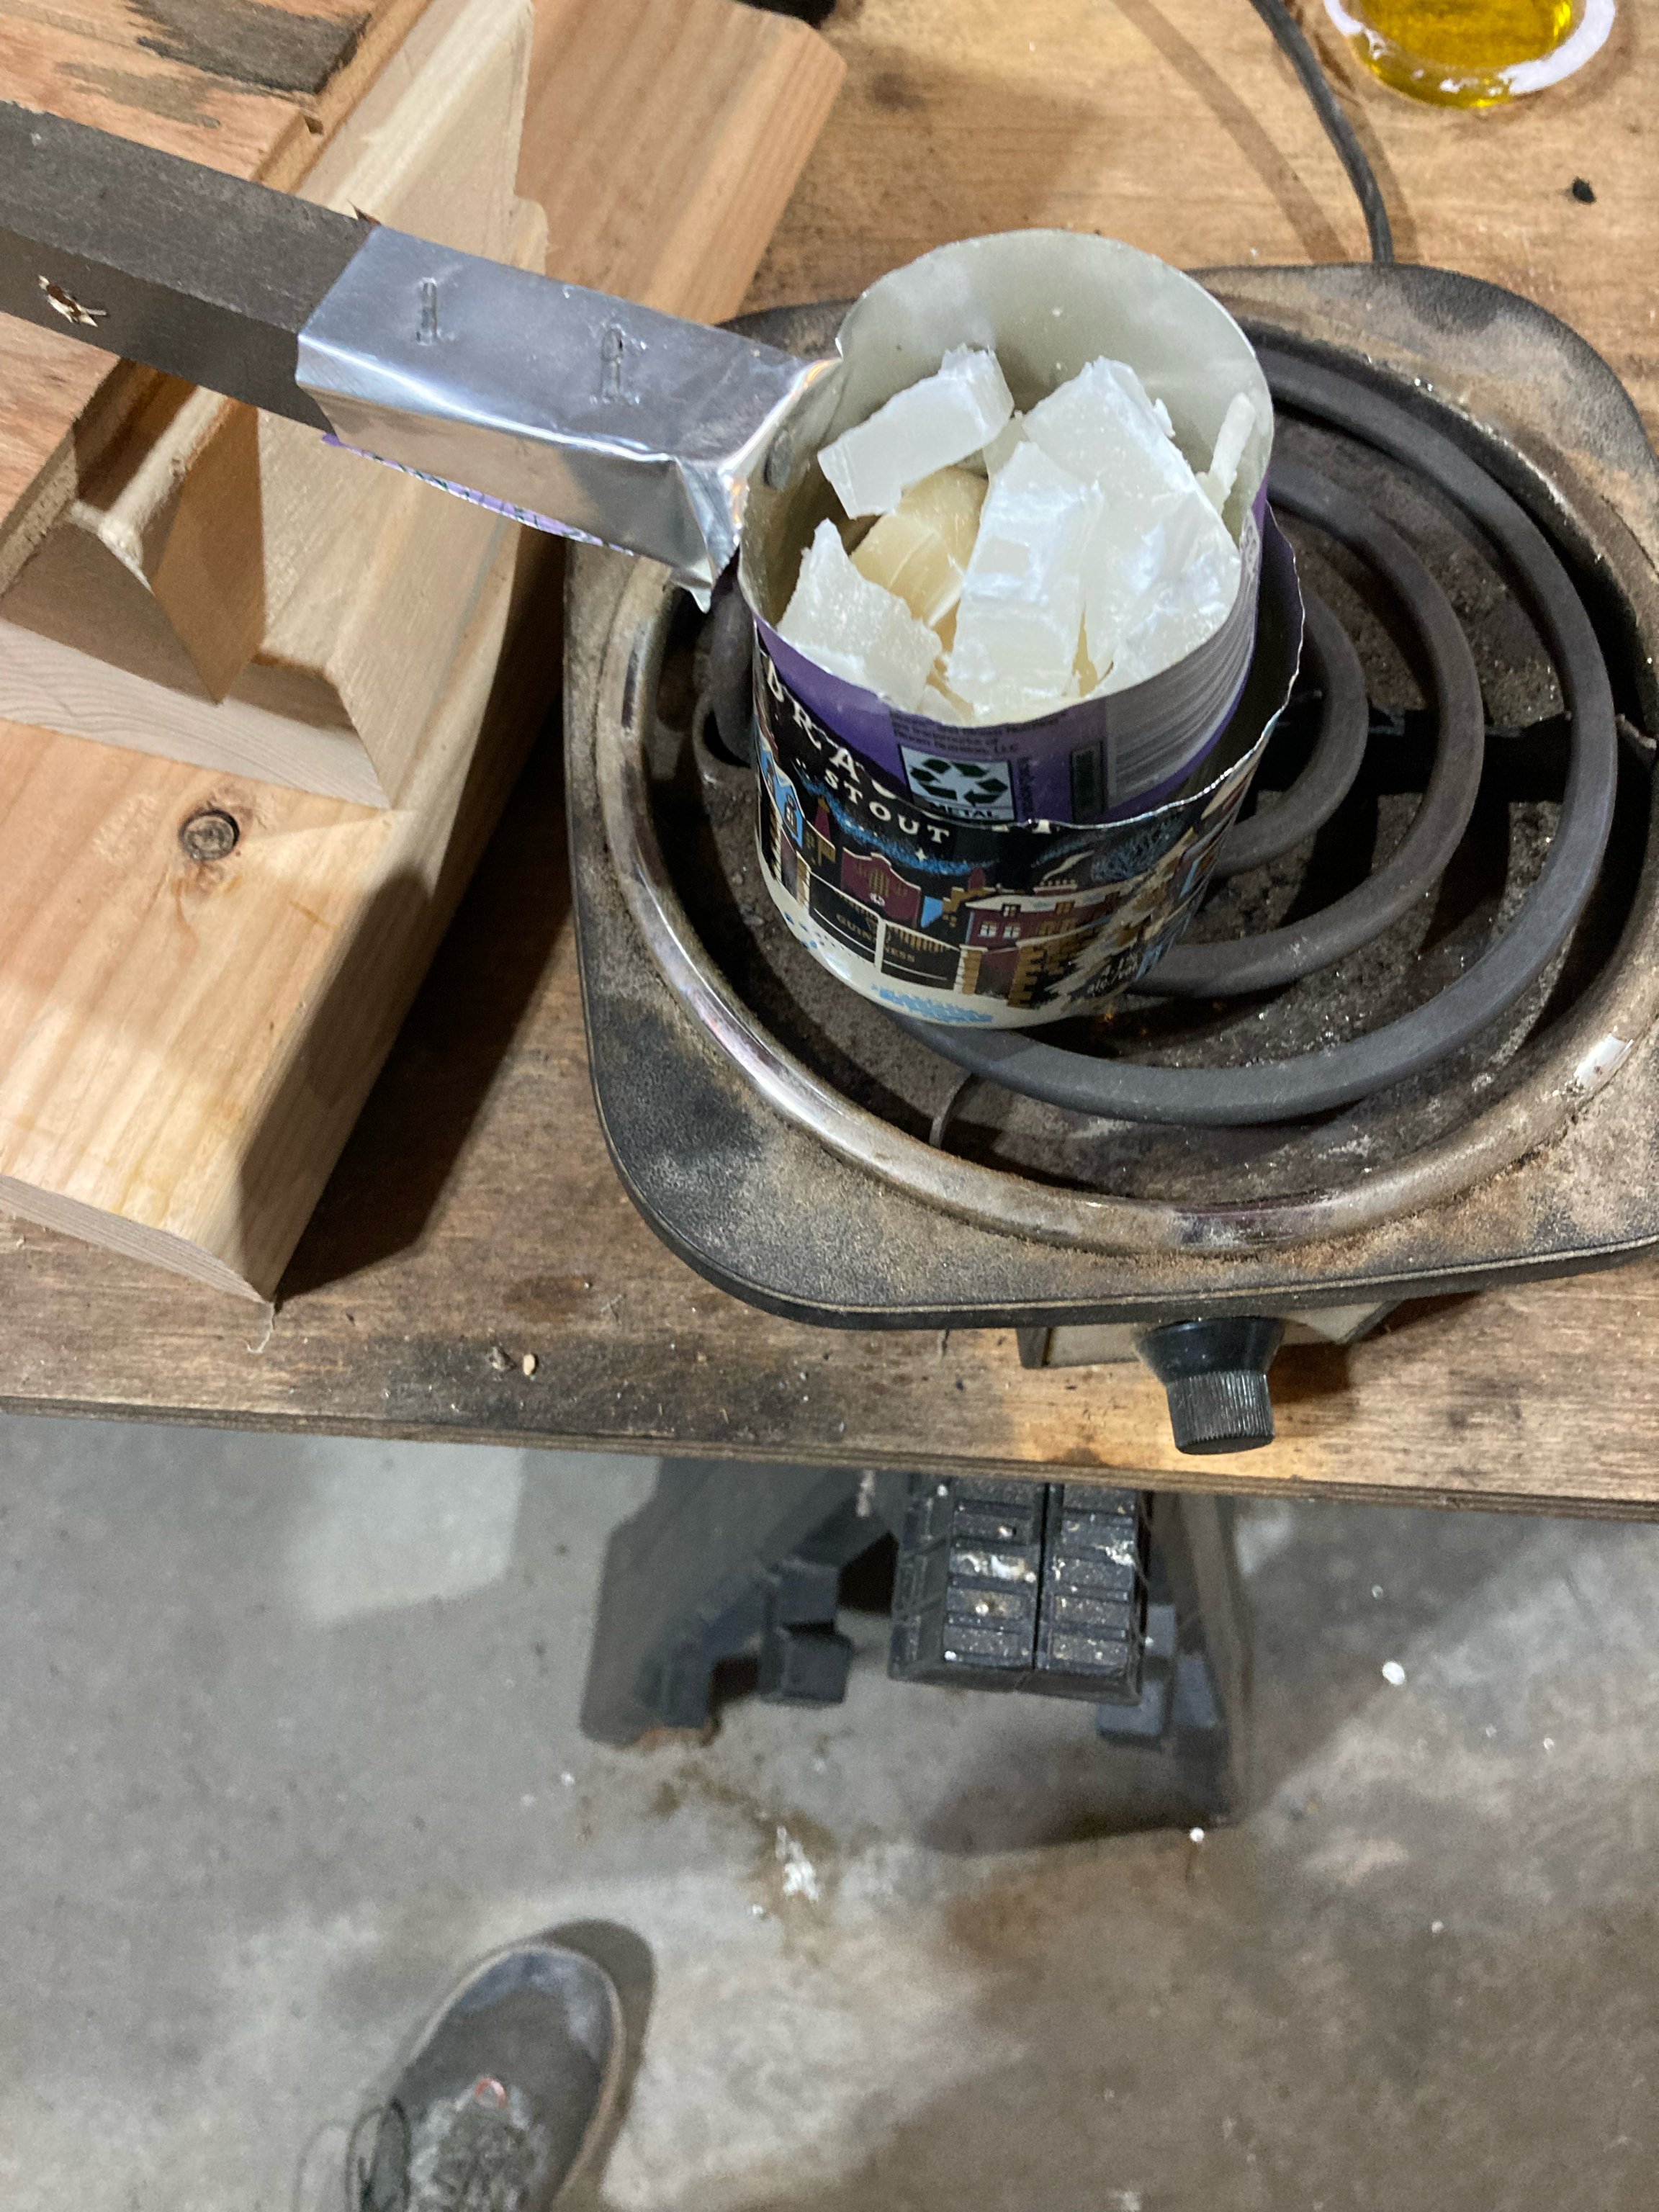
After your lead bullets are made it’s time to lubricate and size them. There's a multitude of lube recipes online and on forums. I chose to go with a simple beeswax, paraffin wax and olive oil mixture because these ingredients were readily available. The ratio was 2 parts beeswax, 2 parts paraffin wax, 1 part olive oil. I melted all these in a small double boiler setup on a hotplate and keep it in my small melting vessel rigged up from an energy drink can and a wooden handle. A common technique to lubricate bullets is called pan lubing. I decided not to do this because it requires a lot of lube and more cooling time. I dipped my bullets in the melted lube almost like making a candle. You should only dip them to a point between the last lube groove and the crimp line. The upside of pan lubing is that when you let everything cool off and push or pull the bullet out, it cleanly comes free of all the wax except the amount that fills the grooves, in the grand scheme of things, this actually uses less lube because it reduces waste, with the dipping technique the entire first half of the bullet gets a nice coating which either sheers off during sizing, or just gets smeared on to the rest of the bullet.
The first batch of bullets that I sized resulted in a lot of defects primarily due to me using the sizing die backwards since I wasn’t using a proper press at the time. I also found it difficult to install the gas checks after the lube was applied because I had to scrape the excess off the bottom. The gas check is a small copper cup that gets crimped to the bottom of the bullet, it prevents bullet base deformation at higher velocities and creates a better gas seal in the rifling than bare lead alone. In the second batch of bullets I did, I realized I could lightly press the gas checks on, using soft taps with a rubber mallet and then dip them in the lube, this worked better. To size them, it's faster to use a press which I will do in the future, but I was able to actually just tap them through with the punch and rubber mallet. Be sure to insert the bullet tip first into the sizing die, as the slight taper of the bullet will correctly center it. That’s all for the actual bullets making for now, these are ready be be put in to cartridges. There are many other ways of doing this as well which I would like to experiment with in the future, such as powder coating and even swaged full metal jackets. Stay tuned for another article soon that will document the actual loading these process.